An 'Action Script Free' way of making an animation using Flash
I'm going to show you a very simple, action-script free way of making an animation using Flash.
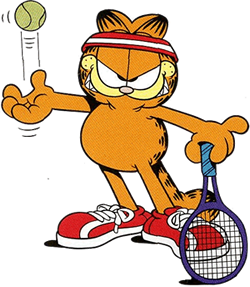
The Garfield character I am animating is the creative property of Jim Davis. I am using the character with kind permission of PAWS Inc within this non-profit making educational environment,
Steps to Creating an Animation
Before you begin an animation you have to know what you want your character to do - make a storyboard. That will give you an idea of which parts of your character are going to 'move' and therefore change in the picture. It will also make you aware of other assets you will need for the scene.
You need the assets for your animation - graphics: the characters, background and other assets like balls, cars etc that you wish to have in the scene. You can produce those in Fireworks and import them into Flash. Also any sound effects you want to incorporate will need to be gathered.
Animators often first work with graphic outlines rather than fully shaded graphics - that cuts out work that might well prove fruitless. My tip would be to get the animation working - and then add detail!
Moving a character on the screen
Your character will not move as a whole - parts of him will move differently. You therefore have to have each part of him drawn as a separate graphic - the arms, legs, eyes, mouth etc. You can then put them in a library - suitably named for easy access.
Obtaining your Assets
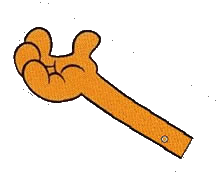
If you are changing a 'still graphic' into an animation - as I am here - open a graphic of your character in Fireworks and trace his 'parts' to make a series of graphics that you can use.
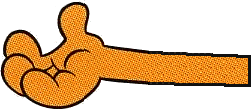
By tracing you can see how the parts fit together in relation to each other, get the sizes right etc etc.You may need to amend some of your graphics - for example I had to extend Garfield's arm.. and make the eyes look different in the head to get them to 'narrow' menacingly.
Each body part needs to be imported into a different layer. You will therefore be able to change each body part progressively .Remember - each body part that is going to move needs to be converted to a symbol (Modify - Convert to Symbol). You will also need a layer for text and logos.
Before you begin your animation you must have all of your graphics (suitably named) saved in the library, and a clear Stage (add background layer if the character has to move relative to it - but hide it from view when you are working).
The Garfield Tennis Animation
I changed the document properties to give me a 600 x 600 screen size. I changed the animation rate to 25 fps.
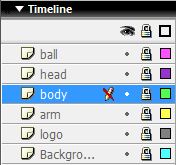
I then created layers for each section - as above graphic shows.
I started setting the stage by putting the body in place against the background and logos - each in their own layer - and inserting an end frame for each layer at frame 85. Inserting that frame at frame 85 meant that the background etc. would be inview as I added the animation. I needed to have the body visible as I added the arm, head and ball - without that 'end frame' I would have been unable to see them as soon as I progressed to frame 2.
I then I locked those three layers and hid the background from view.
Moving arm
You need to start off with the arm layer above the body - when you have it working properly you can rearrange the layers into the proper order.
The arm moves using a motion 'tween. I put the arm in the lower position at frame 1. I then moved the rotation point so that it was located at the 'shoulder' joint of the image body - the rotation point is the tiny circle - usually in the middle of the graphic - just hold down and move it.
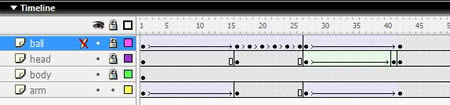
I inserted a keyframe at frame 16 and rotated the arm using Modify - Transform - Free Transform into the upper position. I then inserted a motion 'tween between them by selecting the timeline between the two stages and right clicking and 'creating a motion tween'. The area of the timeline went blue and an arrow appeared on it. I inserted a keyframe at frame 27 and then copied frame 1 and pasted that at frame 42. I inserted a motion tween between those two points (as shown above. I then inserted a frame at frame 85.
The Ball
This has to be in the hand from the lower position to the upper position. A tween is needed between the two images. It then needs to rise and fall back into the hand. It should rise the most when it leaves the hand and least as it approaches the highpoint. You can do calculations for this - but I did it by eye for this graphic, I spaced out the positions for the ball and put a motion tween between each position.
Your overall timeline should fit in with the timeline for the arm (see below).
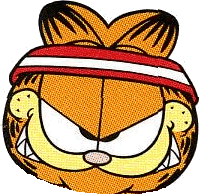
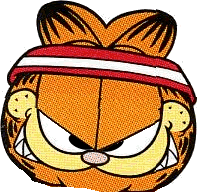
Narrowing Eyes
To get the narrowing eyes effect I had to take my copy of the head and amend it. When I was happy with the outcome I had to save it in Fireworks and then import it into my Flash library.
I wanted Garfield to narrow his eyes as he let go of the ball. I therefore had to put the second head graphic at the point on the timeline where he let go of the ball.
Useful Tips
It's very handy to make a small collection of body parts in a library - just like the button library we call upon. You can collect 'doodles' of eyes, hands etc and build up a collection that you can call upon when you next make an animation.
Other asset lists too can be added within folders in your library - buildings, cars, lampposts etc.
Therefore collect assets adding to your asset bank each time you make an animation. Catalogue them by keeping them in folders - they will then be easy to find.You can share your creations with friends by giving them a copy of your library... and they can share their's - that way you will soon have a big bank of graphics and sounds to use!