Creating Animated Gifs Using Fireworks
Fireworks can be used as a simple Animation Tool. It can produce gif animations. To make more advanced animations or interactive documents you need to use Flash.
Fireworks provides a series of tools that enable an animated gif to be created quicky. The most important tool for creating animation is the 'Frames Inspector'. This should be on the right hand side of your page. If it is not - go to 'Window' on the top menu bar and tick the Frames selection... it will then appear.
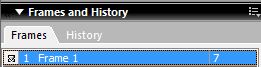
Inserting Frames
A 'frame' is like a cel in a movie - the frames are played one after another to make the animation. Therefore a ny animation must contain two or more frames.
Frames can be added by selecting "Add Frames..." from the Frames Properties (the small arrow in the top right hand corner of the inspector). Selecting "Add Frames..." will open a dialog box that will ask you how many frames you would like to add, and where in the animation you would like to have them appear. The default is 1 new frame, which appears directly after the current frame.
Copy and Paste
You can use copy and paste to add items to frames - that saves time - but there is an even better way!
Distribution to Frames
This allows you to create a series of identical graphics in different places on consecutive frames.
Create a new file in Fireworks. On the stage draw a circle, and with the ALT key held down, select the cicle with your mouse. Holding the key down drag the pointer to the position you want a new circle and then release the mouse button. New copies of the circle will be created each time the mouse button is released while the ALT key is held down. Create six or seven circles in this way.
Now, press Select from the top menu and choose 'Select All' from the drop down menu. This will highlight all the circles that you've created. Then from the Frames Inspector box select "Distribute to Frames" from the botton of the box - it looks like a strip of film.

and 'Hey presto!' the circles will all be put in consecutive frames at the position you chose.
The new frames are created in the order in which the original graphics were created. This is a real time saver!
Shared Layers
An image can also be shared through out an animation -- this is very useful for backgrounds that must appear on every frame.
The only caveat with this feature is that the layer has to be shared throughout every frame of an animation, so groups of frames cannot be selected to share a layer... they must all share it.
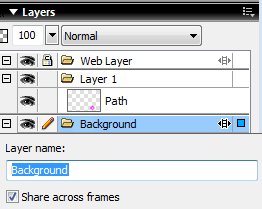
Open the Layers Inspector. This should be on the right hand side of your page. If it is not - go to 'Window' on the top menu bar and tick the Layers selection... it will then appear.
Add a new layer.The shortcut for that is at the bottom of the Layers Inspector.

If this is the first layer that has been created, it'll be called "layer 2". Now add a background image to the layer. Then, from the Layers Inspector, double click on the layer named "layer 2." The layers dialog box opens, allowing the name of the layer to be changed. Ball it background. Now tick the box under the layer name labelled "Share Across Frames". Selecting this checkbox will share any objects in this layer throughout the animation.
Layer order
The order of the layers is important. Layers near the top of the layer window are seen on top of the ones lower down. Your background layer has to be the lowest layer - and therefore it needs to be moved below you animation layer. To do that select the layer and drag it within the table.
Time interval between frames
The play back speed of each frame can be controlled from the Frames Inspector. Double clicking any single frame's timing will open the properties for the frame. The default time is 20/100 of a second, but you can change this speed manually to whatever you want.
Looping
Along the bottom of the Frames Inspector you'll see a GIF Animation looping button, which is set by default to "No Looping".

If you select the GIF Animation looping button, you'll open a drop down menu of animation looping options - whether or not you want the animation to repeat. Choosing that the animation loops a number of times will not increase the size of the file - it will just loop the number of times you asked it to... forever if you like!

Exporting your animation
Select File -- Export Wizard - continue - animated gif - export - and specify the location on your hard drive to which you'd like to save the animation. When the file has been saved, open your favorite Web browser, select File -- Open, and locate your new animated GIF. The animation now plays in your browser!
Your animation can also be exported as a Flash movie. To convert it open your gif in Flash and export it as a swf.

Flash has several advantages over GIF. Flash movies are generally of smaller memory than animated gifs. Flash movies can also be "loaded" into other Flash movies. This has to be done with ActionScript in Macromedia's Flash 4 or above.
Therefore I recommend that graphics are controlled with Fireworks (more tools and special fill effects etc.) and the scripting is controlled by Flash (giving more interactivity) - both tools doing what they do best.
Animation can make the difference for any site or e-portfolio. Used creatively and carefully, the impact of animation can make the difference between a dull site and a site with impact. It improves the users experience.