Word ProcessingMicrosoft Word is the most commonly used tool for creating documents. It was first released on October 25, 1983, under the name Multi-Tool Word for Xenix systems.... it now dominates the market as a word processing package. Step-by-Step Tutorial: How to Use Microsoft WordCreating a document in Microsoft Word simply involves: - launching the program, - selecting a template (or a blank sheet), and - typing your document. Step 1: Open Microsoft Word
Once you have opened Microsoft Word, you will be greeted with a start screen that allows you to choose from a variety of templates or start with a blank document. Step 2: Select a Template or Start with a Blank Document
Templates can be a great way to save time and ensure that your document has a professional look. There are templates available for many purposes: resumes, reports, flyers, etc. If you choose a template, you can customize it to fit your needs by adding or removing text, images, and other elements. Step 3: Start TypingBegin typing your content into the document.
You can use the toolbar at the top of the screen to 'format' your text. You can change the font style, size, color, and alignment. You can also use the toolbar to add bullet points, numbered lists, and other formatting options. Step 4: Insert Images or Other Elements
To insert an image, click on the "Pictures" option and select the image you want to add from your computer. You can easily resize it within the document and choose how it should be positioned within the document - including having text wrap around it. You can then resize and move the image to the desired location in your document. You can also inset tables of data, charts, and other elements by selecting the appropriate option from the "Insert" tab. Step 5: Save Your Document
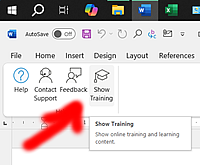
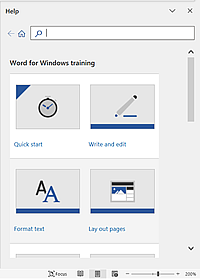
In order to save your document, you need to choose a location on your computer that you want to store the document in and to choose a file name for it. That is best done at the beginning. You can then regularly just hit 'save' as you write. A suitable name for a document is important. I usually start my document names with year and month numerals, so they automatically sort themselves into the order I wrote them in. Once finished you will have a document that you can print, share, move to a folder, copy or continue to edit later... Using Microsoft Word more efficientlyThe software has its own 'help' section and training material. Do make use of it!
.... and then hone your skills using the software and become a Word Whizz!
|
|

Custom Search
 Launch the program by clicking on the 'Word icon' on your desktop or in your applications folder.
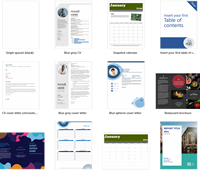 Select a template that suits your needs or click on the "Blank Document" option to start from scratch. I suggest you start with a blank document for your first session - so that you can concentrate on the basics - then have a fun session looking at the templates on offer to get a feel for the different features available.
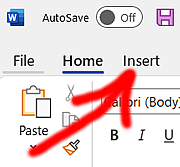 You can add images, tables, charts, or other elements to your document by clicking on the "Insert" tab in the toolbar.
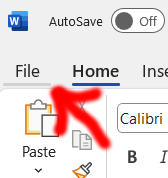 It’s important to save your work frequently to avoid losing any progress in the event of a computer crash or other issue. Before I start writing anything I usually 'save' the document by clicking on the "File" tab on the extreme left of the screen, and selecting "Save As."