Creating a 'bubble' or 'balloon' graphic
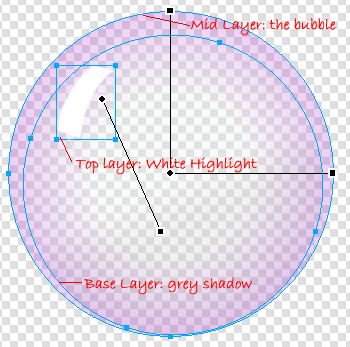
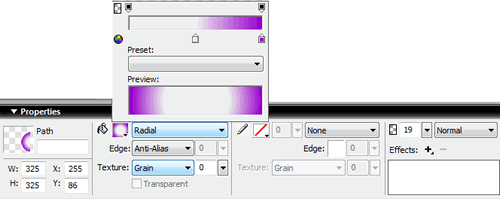
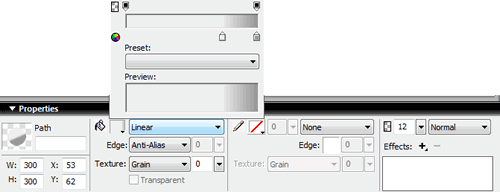
The screen shots I have taken of the property box below show you the gradient settings I used for the 'bubble' graphic above. The transparency setting is at 19% opacity for the bubble and only 12% for the shadow. You can experiment with the effects you can achieve. The highlight is fully opaque and white. You will see that no outline is needed for any of the parts of this graphic. You will also observe that I made the inner shadow circle smaller than the original.
There are some bubbles of different colours in the copyright free section that you can use... but it is more fun to make your own!
- Open your bubble graphic in Fireworks and save it as 'balloon'. - Modify the canvas size - make it much bigger.
You then need to add the little 'knot' at the bottom of it. - Use the pen tool to make a triangle to represent the balloon material below the dot. - Then make a circle for the knot itself using the ellipse tool. - Gradient fill these with a transparent radial fill - I used 53% opaque for this. Simples! There are some balloons of different colours in the copyright free section that you can use... but it is more fun to make your own! |
|

Custom Search
 This exercise is designed to make you think about how you can use the transparency control in the properties box. This facility is especially useful when you are creating your graphic in layers.

 It is easy to turn your bubble graphic into a balloon.
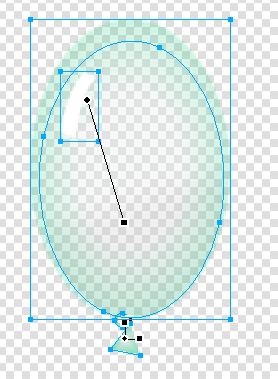 - Select the graphic. At the moment it is circular - to make it into the balloon above you need to elongate it. You therefore need to change the height - I made the height half as big again as the width (1:1.5). To do this alter the width and height in the properties box.
