Using Fireworks - Lesson 1
Fireworks is a very versatile graphics package. You can create static picture graphics with it - and animated gifs. You can save in bmp, jpg, gif or png formats - the advantage of the png format is that you can easily change various elements of your graphic (for example the font of writing on it) without altering the other layers - this is very useful at the design stage. When you load Fireworks the first time, it will look quite complicated - but you will soon get used to it. Lets look at the header bar first..

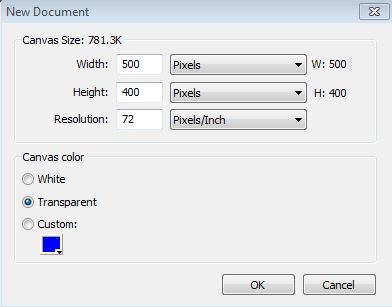
Click on 'File' - this allows you to open, create and save files - it also gives you the option of viewing them in a browser. Select 'new' and the box below will open. I suggest you start with a box of size 500 x 400 - leave the resolution at 72... and choose a transparent background.

Click 'OK' and a checkered screen will appear - indicating a transparent canvas for you to draw on.
Look to the bottom of the screen

Try using the canvas colour menu to change the colour of your canvas - at present it is transparent (Square with a line though it) - this option is available to you to revert to.
 Now let's draw something on the canvas. The bitmap menu on the left gives you a range of tools to create and amend bitmap graphics with.
Start with the easy ones - the brush and pencil. The pencil is straightforward - have a play with that first.
Now click on the brush - a menu bar will open up at the bottom of the page - you can change colour, size of stroke, style of stroke, transparency... experiment! Try writing your name in calligraphy script... if you make a mistake use the rubber from the bitmap menu.


 Now let's look at the vector graphics tools. The line tool is pretty straightforward. Try it out - a tiny square appears at each end of the line vector you construct. Now click on the balck select arrow. This arrow allows you to select the whole vector when you click on a square associated with it. You can then move the vecor around - try it out.
Now use the other selection arrow and see what that enables you to do... if you click on one end of the line you can adjust the size and orientation of your line - if you click on the line (but away from either end) you can move the whole line.
The enclosed shape vector choice has a little arrow at the side of it.
Your shape may differ from mine - it may be a circle of a square - but click on that tiny arrow head an a drop down menu of enclosed shapes will appear.
Choose one and have a play with it - vary the colour of the fill, edge line - size of edge line - texture etc.
Have a really good play and see what is on offer! All sorts of shades, gradient and pattern fill options are open to you - both for the centre of the shape and the outline.
At the bottom of the page is the properties box - you can select the colour scheme from a drop down menu pallet (square with line thorugh it) and the style of fill frol the box to the right of that. The paint bucket is 'fill' of the shape and the pencil is for the outline.

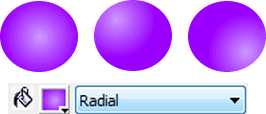
Here are some examples of what you can do...

You can move the direction of the light source on gradient fill by moving the centre placed cursor - try it out!

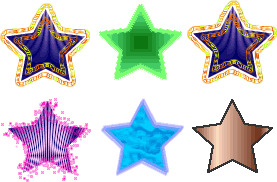
These stars have different fills and outline styles - experiment with your graphics - it's fun!

